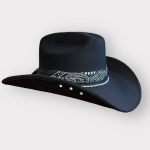
The cowboy hat, a timeless symbol of the American West, is more than just a piece of headwear. It’s a statement of individuality, a badge of heritage, and a practical tool for shielding riders from the sun and elements. But a truly iconic cowboy hat isn’straw just any hat. It’s a hat that’s been shaped to perfectly complement the wearer’s style and fit comfortably for long days on the range.
This comprehensive guide unveils the secrets of shaping your cowboy hat, whether you’re a seasoned rider or a first-time owner seeking that perfect Western look. With a little know-how and the right tools, you can transform a new hat into a trusted companion, brimming with character and personalized flair.
Understanding Hat Construction: The Building Blocks of Shape
Before diving into the shaping process, it’s crucial to understand the basic construction of a cowboy hat. Most cowboy hats are made from felt, a material renowned for its durability, weather resistance, and ability to hold a shape. The felt hat body, also known as the crown, is typically crafted from steamed and compressed animal fur, often rabbit or beaver fur.

Here are the key components of a cowboy hat that influence its shape:
-
Crown: The main body of the hat, available in various heights and shapes, such as cattleman, pinch front, and gambler.
-
Brim: The wide, round brim that provides sun protection. Brim width and curvature are key elements in shaping a cowboy hat.
-
Crease: The indentations or folds in the crown that add definition and style. Common crease styles include center crease, homburg crease, and teardrop crease.
-
Hatband: The decorative band around the base of the crown, often made of leather or straw.
By understanding these components, you can make informed decisions about the shape you want to achieve and the techniques required to mold your hat.
Essential Tools for Shaping: Equipping Yourself for Success
Now that you have a grasp of hat construction, let’s gather the tools you’ll need for shaping your cowboy hat:

-
Hat Jack (Optional): A specialized stand shaped like a human head, ideal for maintaining the hat’s crown shape while shaping the brim.
-
Steamer: A handheld steamer or a pot with a tightly fitting lid will produce steam to soften the felt for easier manipulation.
-
Soft Brushes: A soft-bristled brush helps smooth out the felt and remove any unwanted marks during shaping.
-
Towels: A clean, damp towel will come in handy for wiping away excess moisture and controlling the steaming process.
-
Heavy Objects (Optional): Weights or other heavy objects can be used to press down on the brim and achieve a desired curve.
While a hat jack is a helpful tool, it’s not essential for basic shaping. With careful steaming and manipulation, you can achieve a great shape even without one.
Shaping Techniques: Breathe Life into Your Hat
With your tools assembled, it’s time to embark on the shaping process! Here are two primary methods for shaping your cowboy hat:
1. Steaming and Molding:
-
Prepare the Hat: Place your cowboy hat on a flat surface or a hat jack (if using).
-
Steaming the Felt: Using your steamer, gently steam the felt from a safe distance, focusing on the areas you want to shape. Be mindful not to oversaturate the felt, as this can damage the material.
-
Molding the Brim: Once the felt is softened, carefully bend and manipulate the brim to achieve your desired shape. Use your hands or a soft brush to smooth out any unevenness.
-
Holding the Shape: While the felt is still warm and pliable, hold the brim in the desired position until it cools and sets. You can use weights or other objects to maintain pressure on the brim for a more defined curve.

2. Crown Shaping:
-
Steaming the Crown: For creases or indents in the crown, lightly steam the desired areas of the felt.
-
Shaping with Your Hands: Once softened, gently press or pinch the felt to create the desired crease or indent. Use a soft brush to smooth out any imperfections.
-
Drying Completely: Allow the shaped hat to dry completely at room temperature. Avoid using direct heat sources, as this can shrink or damage the felt.
Remember, shaping a cowboy hat is a gradual process. Start with subtle adjustments and assess the results before continuing. If you’re unsure about a particular technique, it’s always best to err on the side of caution and make minor adjustments.
Advanced Shaping Techniques: Mastering the Art of Customization
For those seeking to create a truly unique look, there are additional shaping techniques you can explore:

-
Pinching the Front: For a classic “pinch front” style, steam the front crease area and gently pinch the felt inwards on both sides to create a pointed indentation.
-
Rolling the Brim: For a rolled brim look, soften the brim edge with steam and carefully roll it upwards or downwards to achieve your desired angle. Secure the rolled edge with tape or small clips until it dries completely.
-
Upturned Brim: For a more dramatic look, create an upturned brim by steaming the entire brim and then carefully bending the outer edge upwards. Use weights or clamps to hold the brim in place while it dries.
-
Resizing the Hat: If your hat feels slightly loose, you can attempt to shrink it a bit. Stuff the crown with newspaper or a towel and lightly steam the felt all over. Let it dry completely on a hat jack or shaped over a round object to maintain its form while shrinking. Caution: Shrinking felt is a permanent alteration, so proceed with caution and in small increments.
Maintaining Your Masterpiece: Caring for Your Shaped Cowboy Hat
Once you’ve achieved your desired shape, proper care is essential to ensure your cowboy hat retains its form and beauty for years to come. Here are some key tips:

-
Store it Properly: When not in use, store your hat on a hat stand or shelf to prevent it from losing its shape.
-
Brush Regularly: Use a soft brush to remove dust and dirt from the felt occasionally.
-
Spot Clean Stains: For minor stains, use a damp cloth and a mild cleaning solution specifically designed for felt hats. Avoid harsh chemicals or excessive moisture.
-
Professional Cleaning (Optional): For deep cleaning or stubborn stains, consider taking your hat to a professional hat cleaner for a thorough and safe cleaning process.
By following these simple care tips, you can ensure your shaped cowboy hat remains a cherished companion for many adventures to come.
Saddle Up and Ride in Style: The Timeless Allure of the Shaped Cowboy Hat
A shaped cowboy hat isn’t just a piece of headwear; it’s a symbol of personal style, Western heritage, and a connection to the open range. With the knowledge and techniques gleaned from this guide, you can transform a new hat into a trusted companion, shaped to perfectly complement your personality and adventures. So, grab your steamer, unleash your creativity, and get ready to ride into the sunset with a perfectly shaped cowboy hat that speaks volumes about your unique Western spirit.


