Whether you’re looking for a playful accessory for a costume party, a whimsical touch for a fall festival, or a unique addition to your wardrobe, a DIY mushroom hat is a perfect project. It’s surprisingly easy to make, customizable to your desired style, and suitable for all skill levels.
This guide will delve into the wonderful world of hats, exploring various crafting methods, materials, and design inspirations. So, grab your crafting supplies, unleash your creativity, and get ready to sprout your very own mushroom hat!
Dive into the World of DIY Mushroom Hats
There’s a magic to creating something yourself, and a DIY mushroom hat is a delightful embodiment of that magic. While store-bought hats might offer convenience, a handmade creation allows you to personalize every aspect, from the size and shape to the colors and embellishments.
The beauty of DIY mushroom hats lies in their versatility. You can craft a simple and classic design perfect for everyday wear, or go all out with a fantastical toadstool hat for a costume party. They’re suitable for adults and children alike, making them a fun family activity for a rainy afternoon.
But what makes mushroom hats so popular? Perhaps it’s their whimsical nature, their connection to the natural world, or simply their embodiment of fun and creativity. Whatever the reason, there’s no denying the unique charm of a well-crafted mushroom hat.
Choosing Your DIY Adventure: Exploring Crafting Methods
The world of DIY mushroom hats offers a variety of crafting methods, each with its own advantages and challenges. Here’s a look at some of the most popular techniques:
-
Cardboard Construction: Cardboard is a readily available, inexpensive material that makes it perfect for beginners. You can easily cut and shape cardboard to create the basic structure of your hat. While not the most durable option, it’s a fantastic way to experiment with different designs before venturing into more permanent materials.
-
Fabric Wizardry: Fabric allows for more flexibility and customization compared to cardboard. You can use felt, fleece, or even upholstery fabric to create your mushroom hat. This method often involves sewing the hat pieces together, but there are also no-sew techniques that utilize fabric glue.
-
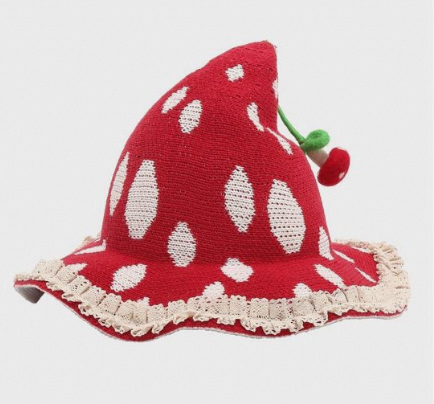
Crocheting Comfort: For those who enjoy the art of crochet, crocheting a mushroom hat is a delightful project. Crochet allows for beautiful texture and intricate details, making it ideal for creating realistic-looking mushrooms. There are numerous crochet patterns available online, catering to all skill levels.
Gathering Your Supplies: A Mushroom Hat Shopping List
Once you’ve chosen your crafting method, it’s time to gather your supplies. Here’s a general list to get you started, with specific materials varying depending on your chosen technique:
- Base Material: Cardboard, felt, fleece, upholstery fabric, yarn (for crocheting)
- Scissors
- Craft Glue: Hot glue gun or all-purpose glue
- Measuring Tape
- Elastic Band (optional, for size adjustment)
- Embellishments: Buttons, ribbons, fabric scraps, paint, fake flowers, etc. (optional)
For specific project requirements, consult tutorials and patterns that align with your chosen crafting method.
Let’s Get Crafting! Step-by-Step Tutorials for DIY Mushroom Hat Creation
Now comes the fun part – bringing your mushroom hat vision to life! Here are some step-by-step tutorials to guide you through the crafting process, depending on your chosen method:
Cardboard Construction:
- Measure and Cut: Measure your head circumference to determine the base size of the hat. Cut out a circle from cardboard slightly larger than your measurement.
- Shape the Dome: Cut a long strip of cardboard and form it into a cone shape. Secure the cone’s pointed end with glue.
- Attach the Base and Dome: Carefully attach the base circle to the wider opening of the cone shape using glue.
Fabric Wizardry:
- Pattern Making: Find a mushroom hat template online or create your own. Trace the pattern pieces onto your chosen fabric and cut them out.
- Sewing the Pieces: Following your chosen pattern, sew the hat pieces together, leaving an opening at the bottom for the head.
- Attach the Elastic Band: If desired, for a more secure fit, sew an elastic band around the bottom opening of the hat.
Crocheting Comfort:
- Select a Crochet Pattern: Select a crochet pattern that suits your skill level and desired hat design. There are beginner-friendly patterns for basic beanie-style mushroom hats, as well as more advanced patterns with detailed gills and spots.
- Crocheting the Hat: Following your chosen pattern’s instructions, crochet the hat pieces. This will typically involve crocheting a circular base and then working upwards to create the dome shape.
- Stuffing and Shaping: Once the hat pieces are complete, gently stuff the hat with lightweight stuffing to maintain its shape.
Let Your Creativity Bloom: Embellishment Inspiration for Your Mushroom Hat
Once you have the basic structure of your diy mushroom hat complete, it’s time to unleash your creativity and personalize your creation with embellishments! Here are some ideas to inspire you:
-
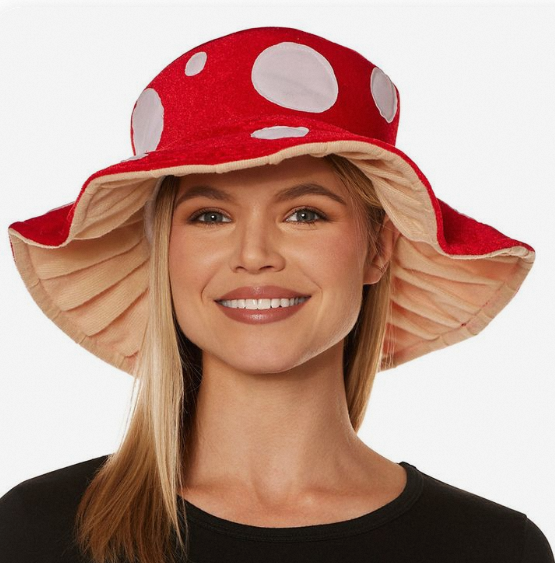
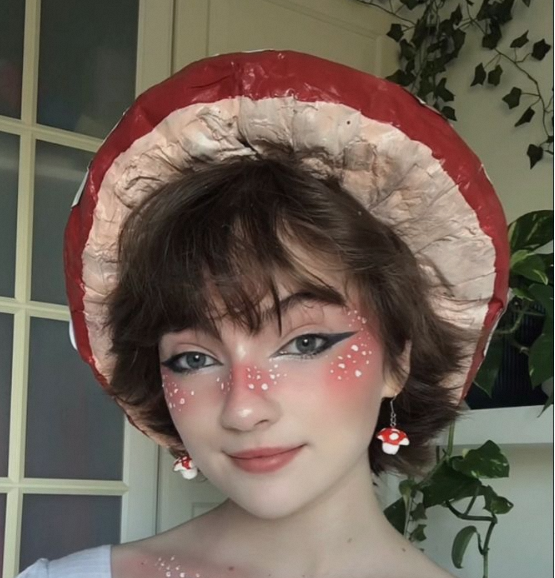
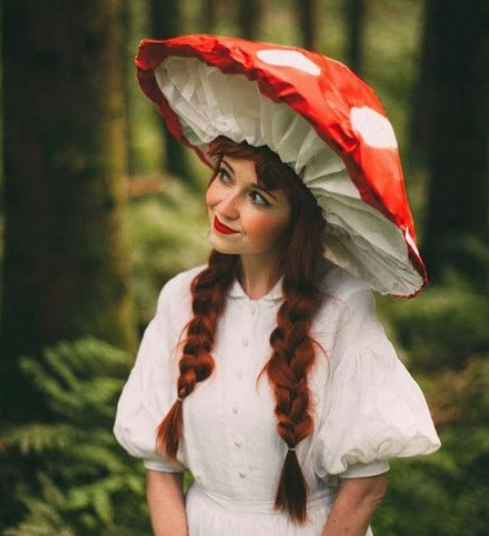
Spotty Delight: For a classic red and white toadstool look, paint white spots onto your red hat with acrylic paint. You can use stencils or create freehand polka dots for a whimsical touch.
-
Gilled Beauty: Recreate the gills found on the underside of real mushrooms. Cut out thin strips of fabric in a contrasting color and layer them around the underside of the hat rim. Alternatively, for crocheted hats, you can crochet the gills directly into the design.
-
Textured Fun: Experiment with different textures to add visual interest. Use felt scraps to create leaves or other natural elements and glue them onto the hat. You can also add textured yarn or fabric for a more rustic look.
-
Beaded Brilliance: For a touch of sparkle, sew or glue on beads in various sizes and colors. This technique works particularly well with felt or fabric hats.
-
Floral Fancy: Attach silk flowers or fabric flower embellishments to the side of your hat for a whimsical and elegant touch. This is a great option for a spring or summer-themed mushroom hat.
-
Light Up the Night: For nighttime wear or a truly magical touch, consider incorporating battery-operated fairy lights into the hat. Weave the lights throughout the fabric or hide them within the dome of the cardboard hat for a subtle glow.
Beyond the Basics: Advanced Techniques for the Discerning Crafter
Feeling confident in your mushroom hat-making skills? Then elevate your creations with these advanced techniques:
-
Dual Tone Delight: Instead of a solid color cap, create a two-toned effect. Use contrasting colors for the top and underside of the hat, or add a patterned fabric panel for a unique look.
-
Sculpted Stems: For a more realistic mushroom hat, consider crafting a sculpted stem. This can be done using rolled cardboard or fabric stuffing, shaped and secured to the base of the hat.
-
Wriggling Worms and Playful Bugs: Take your mushroom hat to the next level by creating little companions. Craft miniature worms, snails, or ladybugs using felt, beads, and pipe cleaners, and attach them to your hat for a delightful touch.
-
Light Up the Way: For an extra magical touch, consider incorporating small LED lights powered by button batteries. These can be hidden within the hat or used to create glowing spots or patterns.
Remember, these are just a starting point. With a little imagination and experimentation, you can create a truly one-of-a-kind mushroom hat that reflects your unique style.
Mushrooms for All! Fun Variations on the Classic Mushroom Hat Design
The beauty of DIY mushroom hat lies in their adaptability. Here are some fun variations to consider:
-
Fungi Friends for Families: Craft a collection of miniature mushroom hats for the whole family. Use different colors, sizes, and embellishments to create a whimsical group of fungi friends.
-
Woodland Wonder: Transform your mushroom hat into a complete woodland costume. Pair it with brown clothing, add face paint featuring leaves or twigs, and carry a basket for a complete woodland transformation.
-
Glowing Guardians: Create a group of glow-in-the-dark mushroom hats for nighttime events. Use white or light-colored fabric or paint and incorporate glow-in-the-dark paint or accents for an enchanting look.
-
Miniature Marvels: Craft miniature mushroom hat ornaments or hair clips. These are perfect for adding a touch of whimsy to backpacks, jackets, or headbands.
Get Ready to Sprout Your Own Creation: Call to Action
So, are you ready to unleash your creativity and craft your very own mushroom hat? With a bit of planning, some simple materials, and a dash of imagination, you can create a unique and eye-catching piece that’s sure to turn heads.
Gather your supplies, choose your crafting method, and let this guide be your springboard. Remember, the key is to have fun and embrace the process! In no time, you’ll be sporting your very own masterpiece, a testament to your creativity and DIY spirit.