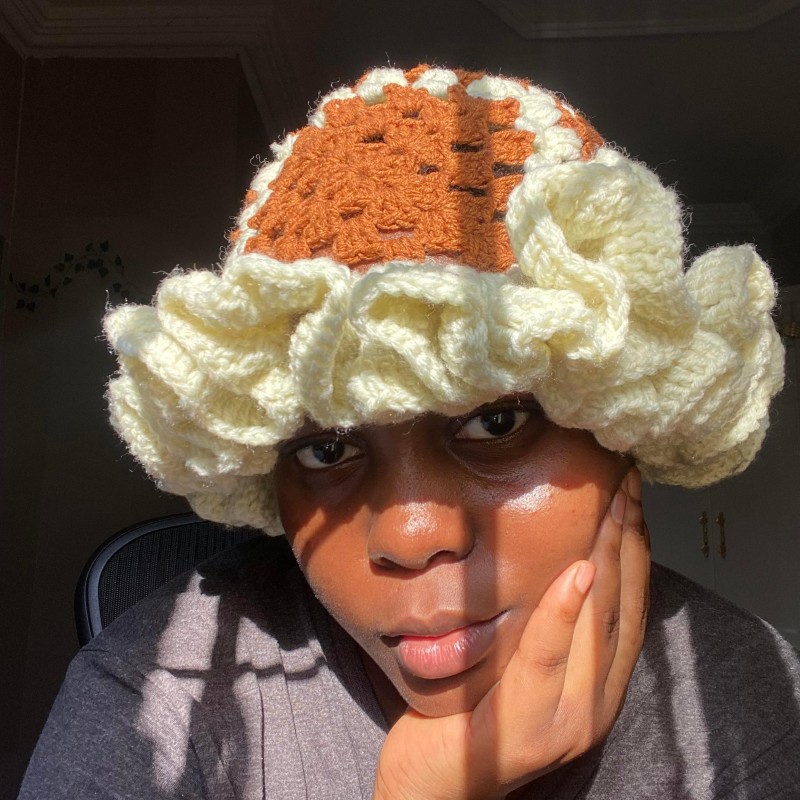
Crocheting a hat can be a satisfying and enjoyable project that allows you to create a personalized accessory for yourself or a friend. Whether you’re making a cozy beanie, a stylish slouchy hat, or a whimsical animal-themed cap, one of the most important steps in hat-making is knowing how to close the top of a crochet hat properly. This involves more than just finishing off your work; it’s about achieving a neat, professional look that enhances the overall aesthetic of your creation. In this article, we will explore various techniques for closing the top of a crochet hat, tips for achieving a polished finish, and troubleshooting common issues. With clear instructions and helpful insights, you’ll be able to master this crucial step in your crochet projects and take your hat-making skills to the next level.
Understanding the Basics of Crochet Hat Construction
Before diving into the specifics of closing the top of a crochet hat, it’s essential to understand the basic construction of a crochet hat. The typical structure of a hat includes:
- Foundation Chain: This is the starting point of your hat and usually forms the base’s band. A foundation chain will determine the size of the hat; make sure to measure appropriately for the desired fit.
- Body of the Hat: This section involves working in circular rows or rounds, creating the main part of the hat that provides coverage. Various stitches, such as single crochet or double crochet, can be used to achieve different textures and patterns.
- Reduction Rounds: As you approach the top of the hat, it’s common to work reduction rounds. This method allows you to decrease the number of stitches in each round, creating a tapered effect that forms the shape of the crown.
- Closing the Top: This is the final step, where you securely fasten the top of the hat after you’ve completed the necessary rounds.
Understanding these components will give you a clearer picture when it comes to learning how to close the top of a crochet hat effectively.
Different Techniques for Closing the Top of a Crochet Hat
There are several popular techniques for closing the top of a crochet hat, each with its unique benefits and finishing styles. Here are a few methods:
- Gathering Stitches: This method involves threading a length of yarn through the final row of stitches and pulling it tight. This gathers the fabric together at the top and secures it beautifully. It’s quick and works well for many yarn types.
- Slip Stitch Method: Another technique is to use slip stitches for the last round. This can create a more seamless closure, blending into the stitchwork of the hat itself. It’s ideal for those looking for a clean finish.
- Drawstring Closure: This involves creating a drawstring at the top, which can be achieved by crocheting a chain and threading it through the final stitches. This method not only closes the top but also allows for an adjustable fit, making it versatile for various head sizes.
- Invisible Decrease: For those who want the most polished look, an invisible decrease can create a more aesthetically pleasing closure. This technique involves carefully closing off stitches to reduce visibility and keep the top looking neat.
- Whip Stitching: If you prefer a hand-sewn finish, whip stitching the top can create a clean and refined edge. By using a needle and matching yarn, you can carefully secure the hat’s top without taking away from the crocheted effect.
Choosing the right technique will depend on your project and personal preferences. Each method has its charm and utility, so consider experimenting with a few to find the one that works best for you.

Step-by-Step Guide: Closing the Top of a Crochet Hat
Now that you understand the various techniques for closing the top of a crochet hat, follow this detailed, step-by-step guide. We’ll focus on the gathering stitches method, which is simple and effective for most crocheters:
- Step 1: Prepare Your Yarn: Ensure you have enough working yarn left to pull through your final stitches. Cut the yarn, leaving approximately 12 to 15 inches, which should be sufficient for gathering.
- Step 2: Insert Your Needle: Thread the tail end of your yarn through a tapestry needle. For those who prefer a crochet hook, you can also use this to finish your stitches.
- Step 3: Gather Your Final Round: Insert your needle under the top loops of each stitch from the last round. Work your way around the entire circumference of the hat.
- Step 4: Pull the Yarn Tight: Once you’ve threaded the yarn through the first round of stitches, pull gently on the yarn. This will gather the top of the hat and close the opening.
- Step 5: Secure the Closure: After gathering the stitches and creating a closed top, tie a secure knot using the working yarn. Alternatively, you can weave in the end inside the hat for a more polished look.
- Step 6: Weave in the Ends: Finally, use the tapestry needle to weave in any loose ends. Ensure they are tucked securely inside the hat to avoid unraveling.
This method results in a tidy closure and offers a lovely finishing touch to your hat project.
Tips for Achieving a Professional Finish
To ensure your crochet hat has a professionally polished finish, keep these tips in mind when closing the top:
- Even Tension: Maintain consistent tension throughout your crochet work, especially when gathering your stitches. Uneven tension can lead to a lopsided closure that detracts from the overall look.
- Properly Choose Hook Size: Using the appropriate crochet hook size will affect how tightly your stitches sit. A larger hook can lead to looser stitches, while a smaller hook will yield a tighter fabric.
- Choose the Right Yarn: The type of yarn you choose can impact both look and feel. Softer yarns may be easier to gather, while sturdier yarns can provide structure.
- Practice Makes Perfect: If you are new to the gathering method, consider practicing on a smaller swatch or sample hat. This will build your confidence and improve your technique before working on larger projects.
- Finishing Touches: Don’t shy away from embellishments or additional finishes once the hat is completed. Adding pom-poms, buttons, or other decorative features can elevate the finished project.
Attention to detail during the closing process will contribute significantly to the final result of your crochet hat, making it look more refined.
Troubleshooting Common Issues When Closing a Crochet Hat
Just like any craft, crocheting a hat may come with typical challenges when it comes to closing it. Here are some common issues you might face and how to overcome them:
- Uneven Gather: If the gathered section looks uneven or lopsided, ensure you have threaded through each stitch of the final row evenly. Gently adjust the gathered stitches to create a balanced appearance.
- Yarn Breakage: If your yarn breaks while gathering, don’t panic. Simply secure the ends and use a new strand of yarn to continue gathering. Tie off the previous strand before proceeding to avoid any loose ends.
- Too Loose or Too Tight Closure: If your closure feels too loose, it may be due to inadequate tension or too many stitches left unthreaded. Conversely, if it’s too tight, you may need to consider using a larger hook or adjusting tension as you gather.
- Visible Gaps: If closing the top leaves visible gaps, check to see if all stitches were properly gathered. If gaps persist, consider using a smaller hook in the sewing approach to draw the stitches closer together.
- Hat Size Issues: If the hat does not fit well after closing the top, ensure you measured correctly during the initial construction. It may be necessary to rip back a few rounds to adjust the size properly.
By understanding these common issues, along with their solutions, you can address potential problems effectively, ensuring a successful outcome for your crochet hat project.
The Art of Personalizing Your Crochet Hat
Closing the top of a crochet hat doesn’t have to be the final touch; you can add your personal flair as well! Consider these ideas to personalize your crochet hat:
- Add Embellishments: Attach flowers, patches, or decorative buttons to the top of your hat after closing it. This can be a wonderful way to add character and reflect your personal style.
- Experiment with Colors: Use contrasting or complementary yarn colors for the hat’s band or brim, creating a striking visual effect. Changing colors at the top before closing can also yield stunning results.
- Incorporate Patterns: Use different stitches or patterns, such as granny squares or color work, to create distinct designs. This could be an interesting way to play with textures and patterns.
- Custom Labels: Consider sewing on custom labels that celebrate your work and make it uniquely yours. This personal touch adds authenticity and is especially nice for gifts.
- Adjust Shapes or Silhouettes: Have fun adjusting the shape of your hat, whether you want a wide-brimmed look or a snug fit. The design can be tailored to fit your aesthetic preferences.
By personalizing your crochet hat, you can create a one-of-a-kind masterpiece that shows off your creativity and passion for the craft.

Conclusion
In conclusion, learning how to close the top of a crochet hat is a crucial skill that enhances your crochet repertoire. With various techniques and methods to explore, crochet enthusiasts can cultivate their craft and create stunning hats that combine aesthetic appeal with functionality. Whether you choose to gather stitches, use slip knots, or practice any other method, the perfect finishing touch can make all the difference when completing your project.
By mastering the closing technique, you can ensure that your hats don’t just look great but also stand the test of time. As you develop your skills, remember the importance of practice, attention to detail, and personal expression in your projects. With patience and creativity, you can create hats that not only serve a purpose but also convey your unique style and passion.
So next time you embark on a crochet hat project, take the time to explore the nuances of closing the top, enhancing both your skills and the beauty of your creations.

