Crafting a top hat is not only a rewarding project but also an opportunity to create a unique fashion statement. With origins tracing back to the late 18th century, the top hat has evolved into a symbol of sophistication and elegance, gracing the heads of notable figures in society, theater, and fashion. Whether you’re aiming to elevate your costume game for a themed party, enhance a formal outfit, or partake in a creative DIY project, learning how to make a top hats can be a fun and engaging experience. This comprehensive guide will cover everything you need to know about making a top hat, from selecting the appropriate materials and tools to step-by-step construction techniques. By the end of this article, you’ll have the knowledge and confidence to create a stylish top hat that fits your personal aesthetic perfectly.
History of the Top Hat
To understand the allure and importance of the top hat, it helps to look into its rich history and cultural significance.
Early Beginnings
The top hat emerged in the late 18th century, quickly gaining popularity among the upper classes in Europe and America. Its introduction coincided with a time of fashion revolution, where social status was communicated through clothing. Originally made of beaver fur, the earliest versions were cylindrical and featured a flat, wide brim.
The Rise in Popularity
By the 19th century, the top hat became synonymous with formal wear. Men began to wear the top hat to social events such as weddings, formal dinners, and even during theatrical performances. Notable characters in literature and theater, including Sherlock Holmes and the iconic figure of the magician, helped cement the top hat as an enduring symbol of sophistication.
Modern Interpretations
Although the top hat is less common in contemporary fashion, it still holds a significant place in various contexts. Today, top hats are often worn during formal occasions, costume parties, and theatrical performances. The creativity around top hat designs has also blossomed, allowing for varied interpretations in color, fabric, and embellishments.
Materials Required for Making a Top Hat
The materials you choose will significantly influence the look and feel of your finished top hat. Here’s a breakdown of basic supplies needed to get started.
Basic Materials
- Felt Fabric: Traditional top hats are often made from felt. Wool felt offers a classic look and excellent durability. For a lighter version, consider using cotton felt.
- Interfacing: This material will provide structure to your hat. A medium-weight fusible interfacing is usually ideal for this project.
- Lining Fabric: To give your top hat a finished look and provide comfort, choose a soft fabric such as satin or cotton for the lining.
- Hat Brim Wire: This will help you shape the brim and maintain its structure. Hat wiring can be purchased at craft stores or online.
- Hat Glue: A strong adhesive specifically designed for fabric will help bond your materials securely.
- Decorative Elements: Ribbons, feathers, and other embellishments can add personality to your design.
Tools and Equipment
- Hat Block or Mannequin Head: This tool helps shape your top hat correctly when assembling the materials.
- Scissors: Sharp, fabric-specific scissors will make cutting your materials easier and more precise.
- Sewing Machine or Needle and Thread: Depending on your chosen assembly method, you’ll either machine-sew or hand-sew certain parts of the hat.
- Iron: A hot iron is essential for pressing the felt and interfacing to achieve a polished look.
Step-by-Step Guide on How to Make a Top Hats
Now that you have gathered the necessary materials and tools, let’s delve into the step-by-step process of how to make a top hats.
Step 1: Measuring and Cutting Your Fabric
Before you start cutting, it’s crucial to measure your head circumference accurately. Here’s how:
- Measure Your Head: Wrap a tape measure around the widest part of your head, ensuring it’s snug but not too tight. Note down the measurement.
- Calculate Fabric Requirements: Depending on the height and width of the desired top hat, you will need to add some extra fabric for seams and allowances. A general guideline is to cut a piece that is 2 to 3 inches wider than your measurement for ease.
- Cut the Main Fabric: Using your measurements, cut out the main shape of the hat from your felt fabric. You will cut a long rectangle for the hat body and a circle for the top of the hat.
Step 2: Preparing the Ring and Brim
Next, it’s time to create the brim and ring that will provide the structure to your top hat.
- Cut the Brim: For the brim, cut a large circle from the felt material. The size depends on your design preference (usually around 3 to 4 inches wide).
- Create the Ring: From the interfacing, cut a strip that matches the height of the hat and the circumference of your finished fabric circle.
- Fuse the Interfacing: Using your iron, fuse the interfacing to your felt for added strength.
Step 3: Assembling the Hat Body
Now it’s time to assemble the main part of your top hat.
- Attach the Ring: Start by attaching the interfacing strip to the felt piece that will form the hat body using fabric glue.
- Form the Hat Shape: Gently wrap the fabric around the mannequin head or hat block and secure it in place. Pinning the fabric can help to shape it correctly.
- Sew the Seams: Using your sewing machine or needle and thread, stitch the edges together. It’s best to use a strong stitch for durability.
Step 4: Attaching the Brim
With the hat body complete, you will attach the brim next.
- Shape the Brim: Using your hat wiring, shape the brim of the top hat to your preference. Bend the wiring into a circle shape that matches the circumference of your hat body.
- Attach the Brim to the Hat Body: Place the brim under the hat body and secure it in place using fabric glue. Ensure it sits evenly around the hat.
- Sewing for Durability: For added strength, sew along the edge where the hat body meets the brim.
Step 5: Adding the Lining
Adding a lining to the top hat helps provide comfort and a polished look.
- Cut the Lining Fabric: Cut a circular piece of lining fabric that matches the inner circumference of the hat.
- Attach the Lining: Pin the lining to the inner edge of the hat body. Use a fabric glue to secure it in place, following the contour of the inner hat.
- Finish the Edge: Hand-stitch or machine sew the lining to the hat body to ensure it stays put.
Step 6: Embellishing Your Top Hat
Now that the fundamentals are complete, it’s time to personalize your top hat with decorative elements.
- Choose Your Embellishments: Select ribbons, feathers, or any other decorative details you wish to add to your design.
- Attach Embellishments: Using fabric glue or needle and thread, securely attach your chosen details around the base of the hat or along the side.
- Finishing Touches: Ensure everything is secure and adjust any elements as necessary for visual appeal.
Step 7: Finalizing and Prepping for Wear
Finally, you’ll want to give your hat a careful once-over to finalize everything.
- Press the Hat: Use a steam iron to gently press your hat, ensuring that it maintains its shape. Be cautious not to scorch the fabric.
- Inspect for Loose Threads: Check for any loose threads or fabric issues, trimming where necessary.
- Display or Wear: Your top hat is now complete! You can either wear your new fashion statement or showcase it as a fun decorative piece.
Tips for Creating Your Top Hat
How to make a top hats? When making a top hat, a few additional tips can enhance your crafting process:
Take Your Time
Creating a top hat can be an intricate project, so don’t rush. Allow yourself ample time to focus on details, which will result in a better finish.
Experiment with Fabrics
While felt is traditional, feel free to explore other fabric options. Consider satin, velvet, or even printed fabrics for a modern twist.
Create Templates
Using graph paper to sketch out your designs and make templates can simplify the cutting process. This step will help ensure accuracy in your measurements.
Personalize Your Design
Don’t hesitate to add personal touches that reflect your style. Unique color schemes, patterns, and embellishments can make your top hat an expression of your individuality.
Common Mistakes to Avoid
While making a top hat can be a fun project, there are common pitfalls to watch out for:
Incorrect Measurements
Always double-check your measurements. Taking the time to measure accurately will save you from wasting materials and ensure a better fit.
Skipping the Interfacing
Some may overlook using interfacing, but it’s crucial for structure. Skipping this step can compromise your hat’s shape and durability.
Ignoring Finishing Touches
How to make a top hats? Don’t overlook the importance of finishing touches. These details often make the biggest impact and demonstrate the effort put into your project.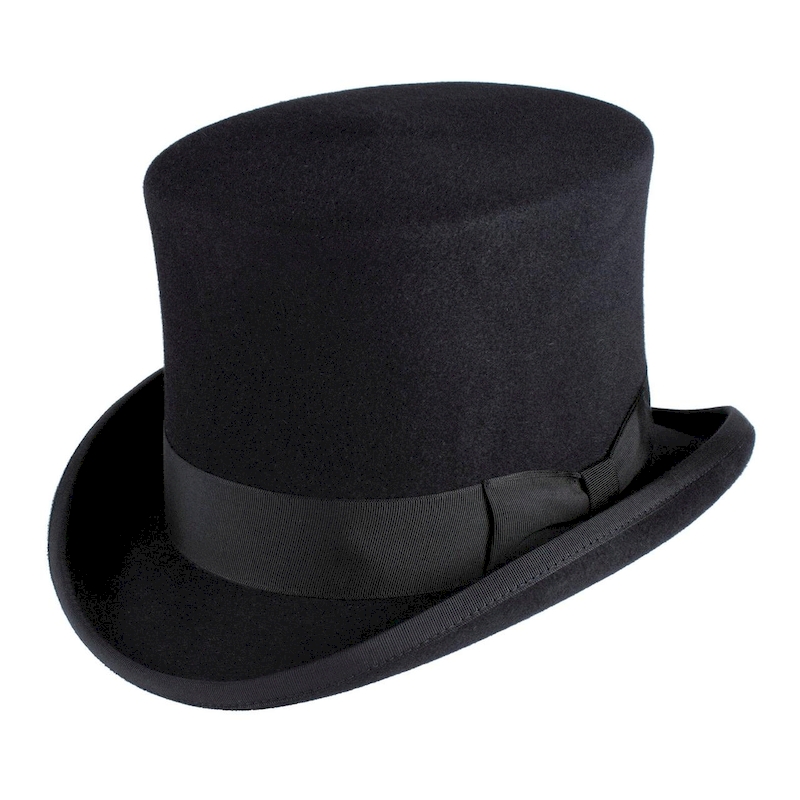
Conclusion
How to make a top hats? Creating your own top hat is a rewarding process that blends creativity with craftsmanship. By understanding the history and functionality behind the top hat, you can appreciate its significance while embarking on your crafting journey. With detailed instructions provided, you now have all the knowledge you need to make a top hat that reflects your style.
This project not only equips you with a stylish accessory for any formal occasion or costume party but also serves as an engaging activity that allows for personal expression. Enjoy exploring various fabrics, embellishments, and colors while you create your unique piece. Remember to focus on quality and take your time, as these factors will lead to a product you’ll be proud to wear. Embrace the art of hat-making and enjoy the process—your tailored top hat awaits!