Unleash Your Inner Spellcaster: A Beginner’s Guide to DIY Witch Hats
Crafting your witch hat is a bewitching way to embrace the magic of Halloween or channel your inner sorceress for a costume party. Not only is it a fun and rewarding activity, but it also allows you to unleash your creativity and personalize your headwear to match your unique style.

This comprehensive guide delves into the wondrous world of DIY witch hats, equipping you with the knowledge and skills to craft your spellbinding creation.
Conjuring the Essentials: Materials and Tools for Your DIY Witch Hat
Before embarking on your magical journey, gather the necessary supplies to weave your witching wonder. Here’s a potion of essential ingredients:
- Fabric: The foundation of your hat. Choose a sturdy, yet flexible fabric like black felt, craft foam, or even cardboard for a more structured form.
- Scissors: To precisely snip and shape your fabric.
- Ruler: For accurate measurements.
- Marking pen or pencil: To mark your fabric for cutting.
- Glue: Opt for hot glue, fabric glue, or even a needle and thread, depending on your chosen construction method.
- Embellishments (optional): Unleash your creativity with ribbons, buttons, faux jewels, glitter, or anything that sparks your imagination!
Weaving Your Spell: Step-by-Step Guide to Crafting a DIY Witch Hat
With your tools and materials assembled, it’s time to bring your witch hat to life! Here’s a step-by-step guide to follow:

-
Measure and Mark: Begin by measuring your head circumference to ensure a comfortable fit. Add an inch or two for ease of wear. Use this measurement to create a half-circle template on your chosen fabric.
-
Snip and Shape: Carefully cut out the fabric based on your template. You’ll need two identical pieces for a sturdier hat.
-
Cone Construction: Place the two fabric circles right sides together. Sew or glue the curved edges together, leaving the bottom opening unsealed. This creates the basic cone shape of your witch hat.
-
Crafting the Brim (Optional): For a classic witch hat silhouette, cut a separate circular piece of fabric with a diameter wider than the base of your cone. Attach the brim to the bottom opening of the cone using glue or stitches.
-
Unleash Your Creativity: Now comes the fun part – embellishing your hat! Experiment with ribbons, buttons, glitter, or any trimmings that resonate with your witchy vision. You can even add a pointed tip to the cone for a more traditional look.
Pro Tip: Feeling adventurous? Craft a pointed hat by using a full circle of fabric instead of two half circles. Simply fold the circle in half, creating a cone shape, and sew or glue the edges closed.
Bewitching Variations: Exploring Different DIY Witch Hat Styles
The beauty of DIY projects lies in their limitless potential for customization. Here are some captivating variations to spark your creativity:
-
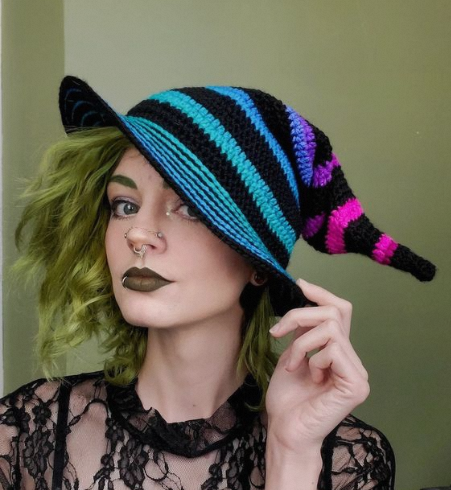
The Tilted Spellcaster: For a touch of mischief, tilt the brim of your hat to one side and secure it with a decorative pin or a dab of glue.
-
The Bewitching Buckled Beauty: Add a touch of sophistication with a fabric belt or ribbon buckled around the base of the hat.
-
The Glimmering Glamour Witch: Embrace the magic of glitter! Apply a coat of fabric glue to your hat and generously sprinkle glitter for a dazzling effect.
-
The Mystical Mesh Masterpiece: Craft a unique hat using black mesh fabric. Layer it over a solid-colored lining for added depth and intrigue.
Beyond the Basics: Tips and Tricks for Spellbinding Success
As you embark on your DIY witch hat journey, here are some helpful tips and tricks to ensure bewitching results:
- Heat it: Use a heat gun or iron to gently mold and shape your hat brim, creating a natural curve.
- Embrace the Fray: For a rustic, which look, leave the edges of your fabric raw and unharmed.
- Channel Your Inner Alchemist: Experiment with different fabric dyes or paints to create a one-of-a-kind hat.
- Safety First: When using hot glue, be cautious and handle it with care to avoid burns.
Unveiling the Magic: Wearing Your Hat with Confidence
Your handcrafted witch hat is more than just an accessory; it’s a symbol of your creativity and a testament to your inner magic. Wear it with confidence and embrace the spirit of the season, whether for Halloween festivities, costume parties, or simply adding a touch of whimsy to your everyday life.
Embrace the Thrill of DIY: Craft Your Witch Hat and Unleash Your Inner Spellcaster
So, grab your supplies, unleash your creativity, and conjure your very own bewitching creation! With a little effort and imagination, you’ll be crafting spellbinding witch hats that will leave everyone spellbound.

Remember, there’s no right or wrong way to create your DIY witch hat. Embrace the process, experiment with different techniques, and let your unique style shine through. Happy crafting!
Unleash Your Creativity with Bewitching Hat Kits!
Feeling the urge to craft your bewitching masterpiece but pressed for time or lacking supplies? It’s time to explore our treasure trove of DIY witch hat kits, each one packed with all the essentials you need to manifest your magical vision!
No need to scour the shops – we’ve got you covered. Our kits are action-packed with top-notch materials, ensuring every piece is primed for your sorcerers touch. We don’t just give you a hat; we provide clear, concise instructions that guide you through every step of the process.
But that’s not all! To ignite your creative flames, each kit comes loaded with an array of dazzling embellishments. From glittery stars to mystical charms, these enchanting extras will have your creative cauldron overflowing in no time.
So why wait? Dive straight into the heart of the magic and start crafting your one-of-a-kind witch hat today! With our DIY kits, the spellbinding journey from concept to creation has never been easier or more thrilling.


